Quantcast
Channel: Coherent Labs
Viewing all 172 articles
Browse latest View live

Coherent UI 2.0 for Unity3D is here!

$
0
0

Coherent UI 2.0 is here!


What’s new?

In Coherent UI 2.0 we have included the most requested features from our users. Core new features of Coherent UI 2.0 include the possibility to implement custom HTTP protocols, group ui resources and work with isolated web sessions. We have also made improvements to the Unity3D plugin itself which is now easier to use than ever.

Please check our product solution page for a detailed review of our new features.


Pricing

Coherent UI 2.0 for Unity3D is a new product which comes with a new pricing, in line with the game engine offer and has a special tier for Indie developers – it is even cheaper! Coherent UI for indies costs $12.99 per month/developer ($129 yearly subscription) making it the most affordable AAA game UI development SDK. We have also revised our overall pricing, reducing the prices for all tiers.

Please note that our subscription method system is still not available as we are in the process of authorization with our billing partner and it will require few more days to finalize. Until then please check out our fully functional free trial of Coherent UI 2.0 or if you are in a hurry contact our sales department at sales@coherent-labs.com or call +1 (800) 943-1784 or +1 (415) 992-5497.

Go to the detailed pricing page.


What happens if I have already bought a Coherent UI 1.X package?

The licensing terms of Coherent UI 1.x are not changing and it will be supported with all the fixes and performance updates actively until at least the end of the year, and possibly beyond that.

We appreciate your support and would like to present our special offer for upgrading to 2.0:

  • if you have purchased a Coherent UI for Unity3D single Standard license, you will get 12 months subscription for the new indie price for free + free developer support package.
  • if you have purchased a Coherent UI for Unity3D single Basic license, you will get 6 months subscription for the new indie price for free + free developer support package.
  • if you hold 5 (five) or more Coherent UI standard licenses or have bought Coherent UI for Unity3D Pro, you will get 50% discount from our bigger tiers.

In order to receive your discount, you will need to submit your 1.Х invoice number in the “promo code” field in our subscription page or send us an e-mail at sales@coherent-labs.com if you are a bigger team.

Please note that these preferential options will be valid if you switch your Coherent UI license from 1.X to 2.0 within the next three months. (before September 15th).


What about mobile support?

Coherent UI 2.0 will support mobile devices at the end of Q3 or beginning of Q4 this year. We need some additional development time to be able to provide seamless UX for the mobile developers. Current holders of Coherent UI 1.X for mobile will continue to receive full support from our side.

We are very thankful for your patience and are really looking forward to providing you with the best UI solution for your project.

Get your copy of Coherent UI 2.0 now!


Unreal Engine 4 tutorial: Coherent UI integration with Blueprints

$
0
0

Hey everyone,

Coherent UI 2.0 is out! Many of you have been waiting for our Blueprint integration and it is here. Check out our first tutorial of the Blueprint integration, as there are more to come. In this tutorial we show you how easy it is to add a Coherent UI view to your game by using just blueprints. Enjoy :)


We will continue working hard on creating as many videos as possible. Please share with us your most desired such HERE.

Download our Coherent UI 2.0 for UE4

Be careful when downloading Coherent UI

$
0
0

Dear friends,


Recently, we saw illegal versions of Coherent UI in several forums and torrent websites. As a software company we stand against piracy and would like to remind you why you should NOT trust such downloads.


All of these are older or modified illegal versions of Coherent UI SDK. This means that the package is broken and incomplete. Also, there is a big chance these downloads contain malware. Besides Unity3D Asset Store, we have not authorized any other third-party website to distribute our products, so if you come across such, you should not trust the source.


If you want to try Coherent UI out, there is a great free way to do so. Please download our fully-functional evaluation version from our website, which guarantees that you will get the latest release of the product and receive full support from us.


Adventures with the Mac plugin system in UE4

$
0
0

As you probably know, Coherent UI supports all the major desktop platforms – Windows, Linux, MacOSX. So, in theory it should be quite easy to port the plugin for the same platforms for UE4. We’ve set a couple of requirements for that task:

  •  No engine changes (so you can safely update the UE4 code which is updated frequently)
  •  There should be no additional steps for the user after the plugin installation

When we first started making the plugin for Windows everything went smooth and we expected the same for the other platforms. Then came our MacOSX port and the code itself was very easy to write. Unfortunately, the deployment of the plugin presented some problems :). The first time I tried building our game for the Editor I got this error:


couitestfps_error_1


Investigating a bit further, our sample game (which was built as a dynamic library for the Editor, libCoUITestFPS.dylib) failed to load because one of its dependencies failed to load – namely our plugin. Checking the dependencies of the game revealed the problem – the dependency was actually “@loader_path/libCoherentUIPlugin.dylib”. The “@loader_path” means that the plugin should be in the same directory as the library that loads it. Which is not the case.


couitestfps_error_2_plugin_placement


My next attempt was to just copy the plugin next to the game. Now the error was different – the plugin was loaded twice from a different location! Okay, I’ll just delete the one in “Plugins” then, and I’ll also have to start the Editor manually since if I do that through XCode it will just output the plugin in the “Plugins” directory again and I’ll get the same error.

Instead I got the next, different error:). This one’s on me though – due to our setup we have to add a line in an ini file that enables our plugin.

[Plugins]
EnabledPlugins=PluginsEditor
EnabledPlugins=CoherentUI

The ini file is different for Windows and Mac, though, and I forgot to add the Mac one. After doing so, I was finally able to run the Editor and see Coherent UI in all its glory:


Screen Shot 2014-06-25 at 3.27.23 AM


I’d also have to mention that since UE4.1 the ini files in the “Saved” folder were ignored and were now loaded from “~/Library/Preferences/Unreal Engine/” instead, which took me some time to figure out when updating the code.

As you can see, the user experience is not the greatest. We contacted Epic and they acknowledged the issue with the plugin deployment and they’re going to fix it (yay!). Unfortunately, the fix is not yet live in the 4.2 release and the first usage is still a hassle.

With the release of Coherent UI 2.0 and our Blueprint scripting support you can now make your UI with no C++ coding, so we decided to release the Mac port anyway, slightly breaking our promise that there are no additional steps after installation. If you’re not constantly rebuilding the C++ code of your game, you’ll only have to do this plugin setup once and then you’re good to go.

So, if you prefer to have MacOSX as your primary dev platform, stay tuned for our next release where you’ll finally find it.

We’ll see what other hidden obstacles we’ll have to tackle with the Linux support next ;)

Get started with Coherent UI today!

We are listening

$
0
0

Dear community,


when we set the restrictions on Coherent UI 2 pricing, we did thorough research on major PC publishing platforms and conducted a survey of UE4 developers on budgets and the pricing of successful games. Those became the foundations of our restrictions, as we wanted to have a right offer for games that are likely to succeed and to become their partner in the long term. Based on our community feedback and some additional research we did, we have decided to remove the title pricing restrictions for all non-subscription licenses.


We are also adding a clarification for our subscription requirements. You can sell virtual currency in as big packs/amounts as you want, the item pricing limit now is specified as the real-money equivalent of the virtual currency. The limitation also does not cover packs/bundles, each separate item should fall into the limit, but there is no limit on the pricing of the packs/bundles.


We will be making some additional changes, which should make Coherent UI 2 even more attractive solution for all kinds of games. There was great interest for console support, from many developers, so we have decided to add console support to all non-subscription tiers. We will also be removing the restrictions for serious gaming, visualization and simulation projects from our subscription for non-commercial uses.


There was a big group of companies that have a special case and neither subscription nor per title works well for them. Those are the companies working as agencies on many small budget games or applications. As we still have not gathered enough data to set a fixed pricing, we would be very happy for such companies to email us at sales@coherent-labs.com with their needs and feedback and we will provide a custom pricing until we figure out the right model.


Although those are our licensing terms, we understand that there is no one-pricing-fits-all solution. Please don’t hesitate to get in touch if you believe that your situation is special and we will try to find a way to make Coherent UI a part of your project.


What should developers consider when using Chromium Embedded Framework (CEF) in their games?

$
0
0

Overview
User interface or GUI is one of the most important aspect of any game or application. When Epic Games released the Unreal Engine 4 subscription a few months ago, we have posted a comparison between the different ways to create user interface (UI) for Unreal Engine 4: Slate, Canvas, and using HTML with Coherent UI HTML5 rendering engine.
Some of the benefits of using HTML for game user interface are: easy to use and widespread technology, a lot of existing libraries and templates, saving considerable time, more convenient workflow, visual tools support and many more.


Open-source solutions
CEF or Chromium Embedded Framework is one of the easiest ways to integrate HTML renderer in any application. Many developers are choosing to roll their own CEF-based Unreal Engine 4 integration and there are some commercial products based on CEF framework.
We will describe the process of creating your own integration of CEF framework in UE4 and list some specifics that should be considered.


Integrating CEF
Chromium Embedded Framework is a free, open-source framework that is based on Chromium web browser and provides the infrastructure developers need to quickly add HTML renderer and JavaScript to a C++ project. Implementation is very straightforward and usually can be achieved in a couple of days. This might be a good starting point if you are interested in using HTML within your UE4 game. More information about CEF can be found at https://code.google.com/p/chromiumembedded/.


The best way to start is to get a pre-built version of CEF for the needed platform, in order to save time in building own version of Chromium and CEF, which is very time-consuming task. For basic web browser functionality or simplistic UI in the game, this should be enough.

1. Download the latest CEF binaries
2. Create a UE4 plugin cloned from BlankPlugin sample (available in UE4) and add references to the CEF library
3. Edit the BlankPlugin code and initialize CEF on plugin initialization with your HTML content – e.g your game main menu (there are many examples on CEF website)
4. On each frame call appropriate render function in the CEF library, which returns rendered HTML view as a bitmap, your plugin should have a UTexture where to copy the bytes from the CEF surface
5. Compose the UTexture to a desired quad or mesh
6. Wire the UE4 keyboard/mouse events to the CEF ones, performing coordinate conversion, so the web surfaces can be interacted with
7. Voila – now you have a simple web browser within your UE4 game!


Beyond simple integration
Of course this is only the beginning, there are more things to consider for a fully-fledged UI solution.

One of the first things to think about is that CEF was not designed for games (or any demanding real-time application). Games have higher requirements in terms of performance and are quite different than normal desktop apps like Chrome itself. For games GPU acceleration and drawing everything in hardware is mandatory for achieving 60 FPS experience.
Chromium and CEF offer hardware (GPU) accelerated rendering, but use a separate operating system process for rendering the page in this case. Getting image bytes to put in UE4 texture requires at least two copy operations on each UI frame between the GPU VRAM and system RAM, transfer it across the game and rendering processes, and then in the UE4 engine upload it back from system RAM to VRAM. These copies are expensive and can significantly impact the smoothness of the game UI, especially if you use animation or play video.

One way to solve this is to render everything on the CPU (which is how CEF does it) but then many modern HTML features are not available. There are alternative solutions, which require significant implementation and modifications to Chromium code, but those require deep understanding of both Chromium and the game engine and are very hard to maintain, because Chromium and CEF code is updated frequently.


Another performance consideration is the lag, or the time it takes for an update to populate to the UI, and the game engine to receive back the rendered frame. The system that CEF uses to transfer the data between rendering and game processes, known as IPC (Inter-Process Communication) has been developed with the needs of a desktop browser, and for games may introduce several millisecond lag which may be undesirable.


Chromium and CEF are designed to take advantage of multithreading capabilities and many of its functions are asynchronous. There is distinct separation of logic in several operating system processes (for more information check out http://www.chromium.org/developers/design-documents/multi-process-architecture ). The good thing about that is that it maximizes the use of the system resources and provides memory isolation. But major drawback is that the rendering is never in sync with the 3D engine and usually lags several frames. This is ok for many types of UI like menus and in-game browsers, but for specific scenario of 3D positioned views, like overhead name-plates that have to move with the player, lag is not acceptable.


As with every complex system, it is more important to test things with real content. Our recommendation is: if you are building your own CEF implementation to test with real UI elements as early as possible, and if you are using a commercial product to require a trial version.


Having up-to-date version of the underlying code is also a major consideration point. Chromium as a platform is evolving very fast with hundreds of fixes and new features each week. There are 2 major rendering paths in Chromium – software and hardware. To integrate accelerated rendering with a DirectX engine, only hardware can be used with high performance. CEF used the software path to implement off-screen rendering, but unfortunately it is being removed in Chromium. This will probably lead CEF to use Chromium workarounds which may not be supported and will limit the upgrade path of the solution. As before, our advice is to test and make sure that all the HTML5 features that you need, like animations and CSS 3D transforms are available, and perform fast enough, before committing to a solution.


The CEF API and commercial solutions, that are thin wrappers based on CEF, expose an interface that is missing many features needed for modern game UI and are not well suited for games. For example one common task in game UI is to determine “Is the mouse on the UI”. When the user clicks on the HUD, the developer must know if an element on the UI was clicked or the mouse should be forwarded down to the game world. Only basic browser or square UIs are easily supported with CEF, but developers have to invest significant time to create such functionality if the game needs irregular UI with transparent elements (like HUDs).


Another important aspect of UI development is the scripting of the interface and its interaction with the game. CEF supports low-level C++ to and from JavaScript communication. Exporting basic types is several lines of code, but creating a cohesive system for more complex custom types, object hierarchies and containers is a serious task. The trivial way in which the data is duplicated in the engine and in the UI JavaScript DOM may lead to excessive memory usage, memory leaks, and de-synchronization. Having a good binding system can be huge time-saver and helps minimize potential bugs, but is a serious investment.


Because CEF and Chromium are open source projects, that integrate many additional libraries with diverse set of licenses, it is very important to review the licensing requirements with your legal counsel.
Additional complication is that some of the libraries that make Chromium and are included in CEF have multiple licenses and depend on compilation options of the libraries. If you want to be sure you may need to compile the libraries yourself, instead of relying on pre-compiled versions. Imagine a situation where you have to take down your released project and replace the UI! If you are acquiring a commercial library, make sure that the vendor has included information in the license agreement and complies with the licenses.


Summary
To sum up, CEF has many advantages for implementing game UI and is very easy to embed and use quickly, but also has several points that have to be carefully considered.


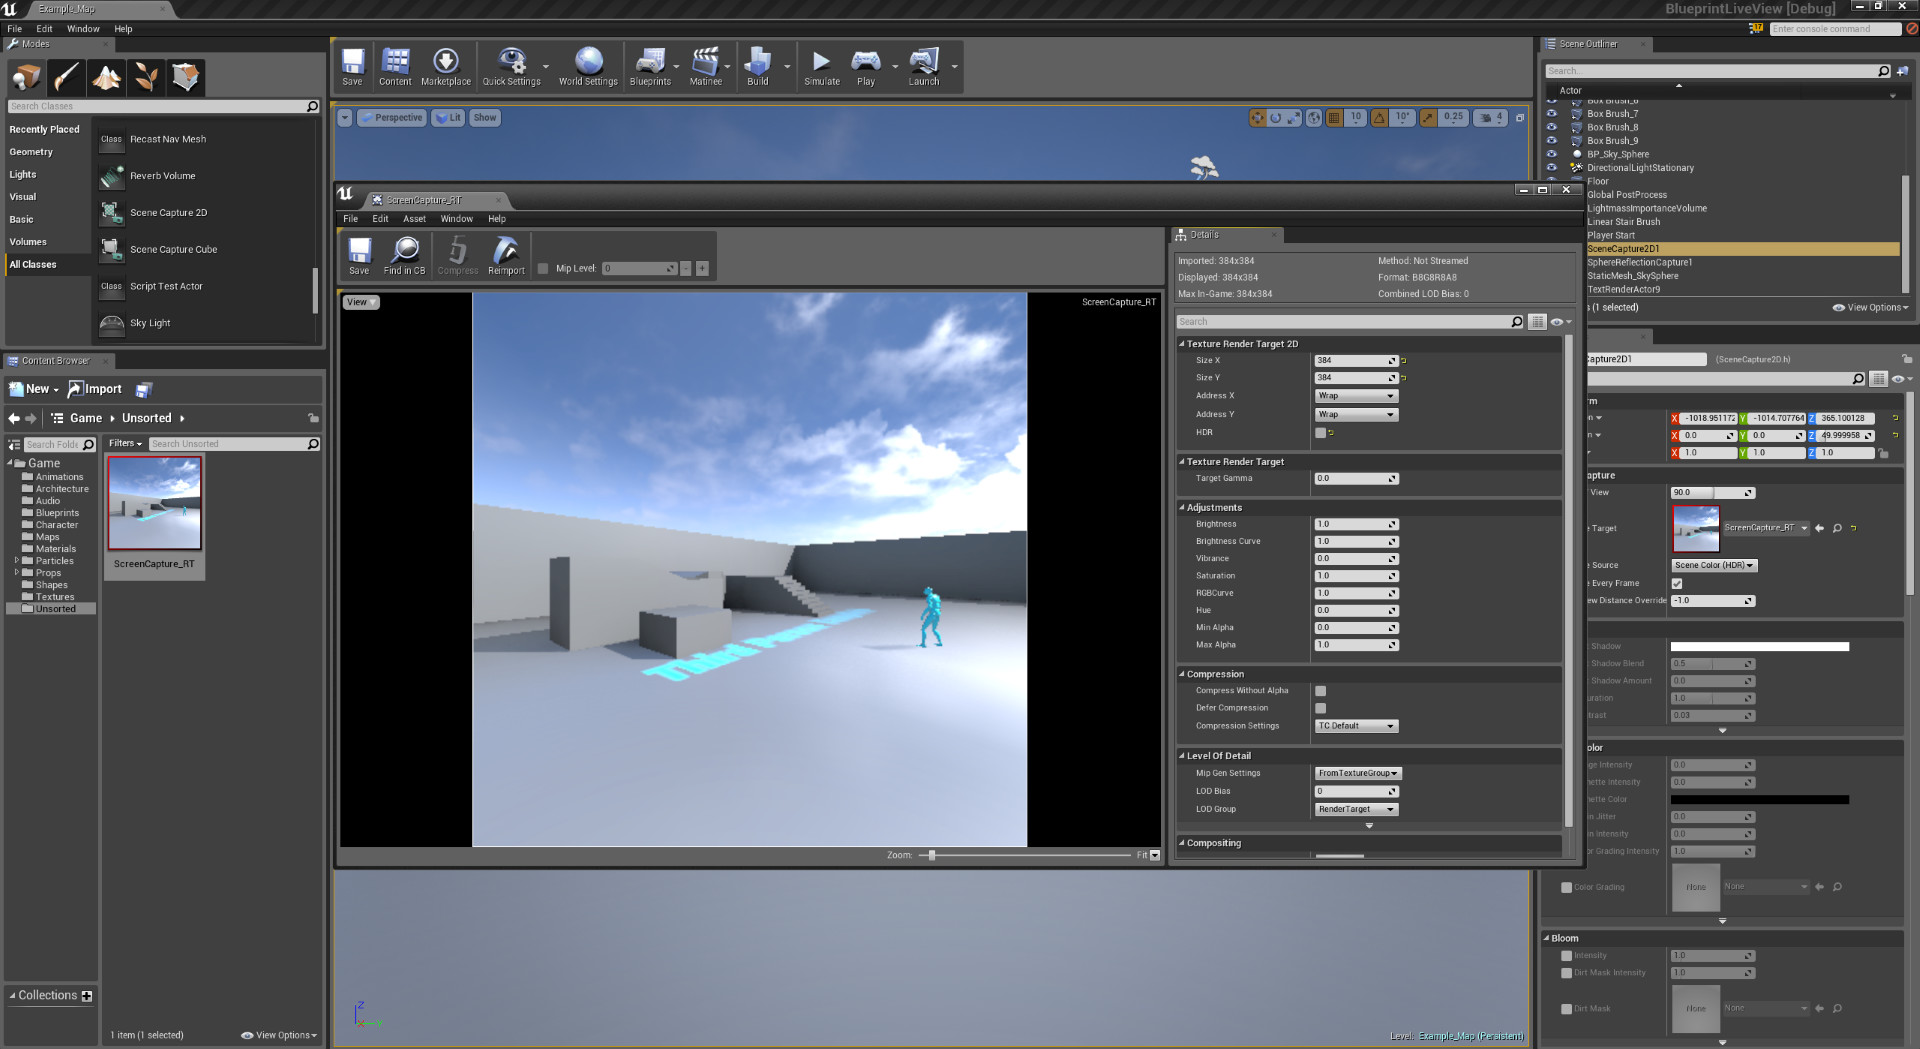
We have not touched many advanced uses like controlling picture-in-picture (live views) support, time control and stopping time (e.g when game is being debugged), multi-character text entry or IME (needed to supporting different languages), audio integration, and more. We may cover some of these in future postings if there is interest.


Our recommendation is to try out your own CEF implementation or other HTML solutions available with realistic content, specific performance requirements, and hardware and software compatibility in mind.


Our product, Coherent UI, is based on Chromium (but not CEF) and is a very good way to start using HTML5 for your game UI. We have addressed all of the above mentioned points and we have plenty of additional features. Our free fully-functional trial will allow you to quickly see and experiment how you can create HTML5-powered UI quickly. Getting started with Coherent UI is quite easy thanks to our extensive documentation, many samples and video tutorials. The product’s high performance has been proven in many games on the market and being deployed to millions of end users allows us to have extensive hardware and software configuration support.


Try the high-performance HTML5-based UI SDK Coherent UI 2.0 for free HERE.

Coherent UI 2.1 for Unreal Engine 4

$
0
0

We are happy to announce a new release of Coherent UI for Unreal Engine 4 plugin. It comes with many new features, improved performance and experience.


HUD

Coherent UI powered HUD for the Shooter Game in UE4

What are some of the major changes we did in this release?

  • The plugin now supports GPU shared textures. It is  a unique Coherent UI feature and improves performance by removing the copying of any View texture from the GPU VRAM
  • The input handling component is now part of the plugin. You can now trivially add HTML5 input to your game without having to copy any C++ code from the sample – all is done through Blueprints
  • Coherent UI 2.1 supports User Media API and WebRTC
  • It is easier to add Coherent UI on any texture on any actor using Blueprints only

Editor

Coherent UI inventory running inside the UE4 editor

Please stay tuned for more video tutorials and feature overviews of Coherent UI 2.1

Get a free trial of Coherent UI 2.1


Coherent UI integration in Unreal Engine 4 (official reel)

$
0
0

Hey everyone,

with Coherent UI 2.1 for Unreal Engine 4 already released and 2.2. just around the corner, we decided to shoot a short demo reel of our integration in UE4. We took the Shooter Game provided by Unreal Engine and put an alternative HUD that replaces the one made with Slate.
 

The UI elements that you’ll see in the HUD are: animated HP bar, animated ammo count, kill counter, current weapon indicator and a detailed kill log.
 

The Demo also glances at the possibilities of using UI elements in the 3D game world. First, we open an inventory, where we change our primary weapon, after which we hit a UI button to “take the elevator” and go to a secret location in the level. Of course the latest can be used for different kind of player interaction (e.g door handlers, monitor screens, etc.)
 

The two way UI binding (game -> HTML and HTML -> game) is done all in blueprints without a single line of C++. The only thing that is done in C++ is broadcasting events for when health or ammo is changed.


Please stay tuned for a series of video tutorials on how we made this reel :)

Get a free trial of Coherent UI 2.1


Improving the UE4 Input system and Blueprint support!

$
0
0

Our current input system for Unreal Engine 4 offers a lot of flexibility and we provide the source code for it so you can modify it any way you want to serve your needs. There is one catch, though – you’ll need to write C++ code to do that. Inevitably, a popular request by our users was to add blueprint support for the input management, while retaining the same functionality. We’re always listening to our clients, so I’d like to explain in details one of the great new enhancements in Coherent UI 2.2 :)
 

First of all, we’ll start with the added UV support for raycasting 3D objects. This means that now the actual render data is checked for collision when interacting with the mouse. While this is the most accurate way to tell where on the surface is the pointer, there are some considerations that have to be taken into account with this approach. Here are some examples:

  • If your mesh is very complex this raycast becomes expensive
  • There are various texture sampling modes and the diffuse texture can be in an arbitrary UV channel
  • The collision mesh of the object must have a specific type

There are, of course, various way to tackle those problems and you’ll see how we addressed the above in our implementation.


The next feature we added in the blueprints is the ability to set the focus to either Coherent UI or your game. When you set the focus to Coherent UI, the mouse starts interacting with all available Coherent UI Views. When you click on a View, it’s remembered as focused and all keyboard input goes to it until Coherent UI loses focus (or you click to another View and it starts receiving the keyboard input).


We also added events for previewing Key/Mouse Down/Up when Coherent UI is focused, since it otherwise consumes the input event and handlers down the chain are not reached.


Let’s do a quick crash course and see what’s new! I created a blueprint third person game and set up a sphere which displays a Coherent UI View. Here’s what the scene looks like:

Starting scene

Starting scene


We’ll now make the input focus switch between the game and Coherent UI upon pressing the “Tab” key – and we’ll do it with blueprints only! For starters, we need to initialize the Coherent UI Input system. This is done by spawning and instance of the “CoherentUIInputActor” class and initializing it:

Spawning the Coherent UI Input Actor

Spawning the Coherent UI Input Actor


Now after we hit play we’ll have an initialized Coherent UI input system. Let’s check out the properties that you can set in the “Initialize” function of the actor:

  • Collision channel – only objects of this physics system type will be checked for being under the cursor. The physics raycast uses an acceleration structure to check for hits and applying a type filter makes it event faster.
  • Address Mode – This is the texture sampling mode used for your object. In most cases it’s going to be “Wrap”, but for some effects you can use one of the others – “Clamp” or “Mirror”. That’s why we’ve exposed this option so you can change it.
  • UV Channel – When using complex materials, the base diffuse texture might not always be in the first UV channel and in those cases you’ll get wrong results. With this option you can set the UV channel that will be used.
  • Raycast quality – Complex meshes have lots of triangles and raycasting them each frame could have a performance impact. This option controls the LOD level of the mesh that will be raycast – you can balance between speed and accuracy.

These options are relevant only for Views on 3D objects and will have no effect for HUD Views.


Next, we’ll add a trigger for setting focus to Coherent UI. For demonstration purposes, this trigger will be pressing the “Tab” key, but you can do it through a physics trigger or anything else you like. Here’s the blueprint now:

Focusing Coherent UI with the Tab key

Focusing Coherent UI with the Tab key


Note that I used the “Toggle Coherent UI Input Focus” function, which is a convenience function for toggling the focus state without having to track it. You can also set (or unset) it directly and ask the Input Actor if Coherent UI has focus.


Now when you press “Tab” the player input stops working, the mouse cursor shows up and you can interact with Coherent UI Views using mouse/keyboard:

Focused Coherent UI View in the game

Focused Coherent UI View in the game


Once you have Coherent UI focused, you’ll probably want to be able to move you character at some point. Because of UE4′s design you won’t receive the “Tab” key event in the blueprint if you’re not in “Mouse Control” mode in the sample:

Mouse Control message

Mouse Control message


The Coherent UI Input system uses the same method for stopping player controller input so this means we’ll need to do something else to detect when the “Tab” key is pressed while Coherent UI is focused so we can unfocus it. One option for doing that is through the Coherent UI Binding – you can add some JavaScript code in your page that handles the “Tab” key, fires an event and the handler for that event makes Coherent UI lose focus. An alternative (easier) method would be to use the new Input Actor Key and Mouse preview events:

Coherent UI Input Actor Events (context-specific)

Coherent UI Input Actor Events (context-specific)

Getting game focus back from Coherent UI

Getting game focus back from Coherent UI


The “Coherent UI Input Key Down” event is bound after the actor is initialized and when Coherent UI is focused and you press a key the “KeyDown_Event” is fired. It provides a variable telling which key was actually pressed so we just add an “Enum equals” node and if the key pressed is “Tab”, we toggle the input focus. Since this event is only fired when Coherent UI is focused, this means we’ll now transfer focus to the game and make a conclusion to this post.


That’s how we improved the Coherent UI input system for UE4 and implemented the blueprints for it. We’ll be happy to hear your feedback if you like it or you have other ideas for making it even better.


Here’s a bonus – me trying to play a web demo of  “Assassin’s Creed®: Pirates” (http://race.assassinscreedpirates.com/) on a fairly odd surface :)

Assassin's Creed®: Pirates

Assassin’s Creed®: Pirates


Download Coherent UI for Unreal Engine 4 from Here!

Live game views for Unreal Engine 4

$
0
0

We’re happy to introduce you to our latest feature for Unreal Engine 4 – Live game views (a.k.a. Picture-in-Picture)! We’ve had this feature in our core product for a while now and the time for an UE4 implementaion came with version 2.2.


Let’s go back a little and explain what a “live view” actually is, for anyone who doesn’t know. Simply put, it’s a high performance way to transfer image data from your game engine into a HTML canvas in your UI. You can read more about this feature in this blog post.


Getting right to the point – how can you use live views in Unreal Engine 4? We tried to make the integration extremely simple so here’s what you need to do:

  • Add a Coherent UI component
  • Add a Coherent UI Live View component (it depends on the Coherent UI component)
  • Set up the UTexture that is going to be transferred to the HTML UI
  • Add code in your HTML page that will render the image data into a canvas
  • Done!


This is all very easy so let’s go through a practical example – we’ll set up a secondary camera that renders the scene to a texture and we’ll send that texture to Coherent UI. We’ll start with the Blueprint Third Person template and the Coherent UI plugin added to it.  Next, we need a secondary camera that renders to a texture target. Grab the “Screen Capture 2D” and place it somewhere in your scene so it displays something interesting :) .

Scene Capture 2D

Scene Capture 2D


After that, create a new “Render Target” and assign it as a “Target Texture” of the Screen Capture 2D actor.

Creating a new Render Target

Creating a new Render Target


Assigning a texture to the screen capture actor

Assigning a texture to the screen capture actor


Double click on the texture and disable the HDR check – it’s currently not supported for live views. You can optionally change the resolution.

Texture properties

Texture properties


We’ll now create a Coherent UI HUD and display a page that renders the texture from the “Screen Capture 2D” . To do that, we need to make a blueprint for the HUD. First, select the CoherentUIGameHUD as a parent.

New blueprint with CoherentUIGameHUD parent

New blueprint with CoherentUIGameHUD parent


Open the blueprint for editing and add a Coherent UI Live View component, then set its Texture property to the “ScreenCapture_RT” texture. Leave the “Update every frame” checkbox ticked. This will send the texture to the UI every frame – otherwise you can do it manually. Note that the same steps can be applied on a 3D surface with Coherent UI  (live views are not limited to HUDs).

Adding a Coherent UI Live View component

Adding a Coherent UI Live View component


Setting Coherent UI Live View properties

Setting Coherent UI Live View properties


That’s everything that’s needed for the configuration of the live view! Now, let’s set up our game to use the custom blueprint HUD we created. To do that, open the “World Settings” panel, create a new game mode and set it up like the picture below:

Using the custom HUD blueprint we made

Using the custom HUD blueprint we made


All that’s left to do in UE4 is to make a Coherent UI HUD – here’s the blueprint I used:

HUD blueprint

HUD blueprint


Here’s the final piece of the puzzle, the live_view.html:

<!DOCTYPE html>
<html lang="en">
	<head>
		<script type="text/javascript" src="js/jquery-2.0.3.min.js"></script>
		<script type="text/javascript" src="js/coherent.js"></script>

		<style>			
			#live-view-container {
				position: absolute;
				left: 100px;
				bottom: 100px;
				-webkit-perspective: 500px;
			}
			#live-view-canvas {
				-webkit-transform: rotateY(30deg);
			}
		</style>
	</head>
	<body>
		<div id="live-view-container">
			<canvas id="live-view-canvas" width="384" height="384" style="border:1px solid #d3d3d3; ">
				Your browser does not support the HTML5 canvas tag.
			</canvas>
		</div>
		
		<script type="text/javascript">
			$(document).ready(function() {
				var c = document.getElementById("live-view-canvas");
				c.onEngineImageDataUpdated = function (name, image) {
					// If you have more than 1 live view in your page, you'll need to check the name of the live view link
					var ctx = c.getContext("2d");

					// Make the canvas semi-transparent
					var data = image.data;
					for(var i = 0, n = data.length; i < n; i += 4) {
						data[i + 3] = 120;
					}

					ctx.clearRect(0, 0, c.width, c.height); // It's important to clear the canvas before drawing
					ctx.putImageData(image, 0, 0);
					ctx.fillStyle = "orange";
					ctx.font = "16pt Arial italic";
					ctx.fillText("Text from JavaScript!", 10, 50);
				}
			});
		</script>
	</body>
</html>


Basically, it’s just a <canvas> that’s as big as the texture we set up in UE4. The important function is the onEngineImageDataUpdated callback, which is called every frame in our case (remember the checkbox in the Coherent UI Live View component earlier?). The name argument is the name of the live view link that was set in the component and the image argument is an ImageData object that contains the pixels from the texture. In the sample implementation I changed the alpha value of the received ImageData to about 50% and added some text on top, just for kicks. I also added a CSS perspective for the whole canvas so it looks groovy :) .   And here’s the final result:

Final result

Final result


I hope you like our new feature which enables you to add minimaps, character portraits and much more in your UI. You can even do some post-processing on the canvas object if you feel like it.   We’ll also be making a video tutorial out of this to see it in action so stay tuned!

Try Coherent UI and add picture-in-picture in your UE4 UI.

Shared textures support for the WPF control through D3DImage

$
0
0

This post is just a short preview for a substantial performance improvement in our WPF .NET control with Coherent UI 2.0. Until now, we used the system memory to transfer the image data from Coherent UI to the WPF application. While this works well in practice, there are some cases when you might want to display something in a very high resolution – say 8x8k. Copying that much memory inevitably lowers the performance.

One of our clients needed those very high resolutions and asked us if we can do something about it, suggesting transferring the surfaces through a D3DImage. By doing that we could use shared textures instead of the system memory to transfer the images. This way the image stays on the GPU and no copying occurs, leading to some quite substantial performance gains.

We’ve already explored that possibility previously, but haven’t implemented it since it was not going to be available for all OSes. With the recent end of support for Windows XP though (finally!), we decided to go for it and add an option for using shared textures. This feature is available on Vista SP2+ but all kinds of surveys suggest that the vast amount of users cover that requirement.

Here’s some benchmarks using the new feature (I used my 2k monitor so some of the pictures are cropped since the back buffers are larger):


2k Bunnymark shared memory

2k Bunnymark shared memory


2k Bunnymark D3DImage

2k Bunnymark D3DImage


4k IE Fishbowl shared memory

4k IE Fishbowl shared memory


4k IE Fishbowl test D3DImage

4k IE Fishbowl test D3DImage


For my last test I checked the FPS differently:

<Label Content="" Name="fpsText" Margin="2" Width="128"/>

....

private int m_Frames = 0;
DispatcherTimer m_FPSTimer = new DispatcherTimer();

....

CompositionTarget.Rendering += (s, a) =>
{
	++m_Frames;
};
m_FPSTimer.Interval = TimeSpan.FromSeconds(1);
m_FPSTimer.Tick += (s, a) =>
{
	fpsText.Content = string.Format("FPS:{0}", m_Frames);
	m_Frames = 0;
};
m_FPSTimer.Start();

And here’s the shocker:

8k test logo animation shared memory

8k test logo animation shared memory


8k test logo animation D3DImage

8k test logo animation D3DImage


Coherent UI 2.0 for .NET comes with a fully-functional free trial. Get your copy from here.

Video Tutorial: Coherent UI integration in UE4 (part 1 of 3)

$
0
0

Hey everyone,


recently, we published our official video reel of Coherent UI in Unreal Engine 4. As promised, we have prepared a short series of three video tutorials in which we will show you the Coherent UI – UE4 integration in the making. We will also demonstrate how to call Blueprint functions from JavaScript and vice versa.


The first part of the series will show how to integrate Coherent UI with your Unreal Engine game with few simple steps:

1. Copy the CoherentUI folder to “YourGame\Plugins to YouGameFolder\Plugins”.
2. Reboot your editor.
3. Go to “Window->Plugins->User Interface” and enable the plugin.
4. Spawn and setup a view entirely from blueprints.


Please stay tuned for part two of the series where we will show you how to do game to HTML/JavaScript binding :)

Get a free trial of Coherent UI for UE4

Video Tutorial: Coherent UI integration in UE4 (Part 2 of 3)

$
0
0

Part 1 is available here.
 

The second part of this tutorial will go a bit further in the UE4 game UI integration. We will show you how to do game to HTML/JavaScript binding in your Unreal Engine 4 project. For this purpose we will create a simple game logic that counts the character’s health and ammo (number of shots that have been fired). We did it in the following steps:

1. Setup the Health and ShotsFires variables.
2. Listen for the Character Fire event.
3. Increment the ShotsFired variable.
4. Trigger a JavaScript event sending the ShotsFired to the HTML as parameter.
5. Listen for player Hit events.
6. Check if the player is hit by a projectile.
7. If the player is hit -> decrease health.
8. Send the current Health to the HTML.


Please stay tuned for part three of the series :)

Get a free trial of Coherent UI for UE4

Video Tutorial: Coherent UI integration in UE4 (part 3 of 3)

$
0
0

Part 1 is available here.
Part 2 is available here.
 

The third part of this tutorial will show you how to do HTML/JavaScript -> game binding and present a sample usage of UI in a 3D world. In order to keep it simple, we will spawn a clickable button in the world and attach game logic on its click (moving the object). We’ll go straight to the steps to get it done.

1. Copy the resources needed for this tutorial.
2. Open the Level Blueprint.
3. Spawn a CoherentUIInputActor and Initialize it.
4. Spawn a CoUIPlane that will hold a HTML button.
5. Register for the button click event.
6. Create a bool variable that will hold the state of the cube.
7. Move the cube depending on its state.


I hope you enjoyed these tutorials. Please stay tuned for more :)

Get a free trial of Coherent UI for UE4

Video: Live game views in Unreal Engine 4

$
0
0

With Coherent UI 2.2 release for Unreal Engine 4 we introduced our new feature Live Game Views. We already explained how to create picture-in-picture in your own project Here. Now, we are happy to show you a video tutorial on how we did it and also better demonstrate the final result :)


Please stay tuned for more UE4 tutorials :)

Get a free trial of Coherent UI for UE4


Take part in the Games of Glory –а great MOBA game on Kickstarter!

$
0
0

We are in the peak of summer 2014 and while some of you are taking a vacation on the seaside or mountain resorts, others are releasing great Kickstarter campaigns :) Well, I guess there is always a balance.


Today I would like to introduce to you Games of Glory – a new generation of MOBA games, created by Lightbulb Crew. The Games of Glory are the gladiator games of the Synarchy, the intergalactic empire controlled by the seemingly all-powerful Synarch. The Synarch imposes peace over all in his dominion, and protects them from the Exoi. The Games of Glory serve as an outlet for citizens to blow off steam as well as a medium to resolve large-scale disputes. The winners gain fame and money, as well as political influence.


I’ll come later back to the game, first let’s see what Anders Larsson, company’s CEO has to say about the story behind the team and the idea of the game:

I started thinking about starting a video game company back in 1997 together with one of my friends from University, Johan Wirde. Life got in the way, but 15 years later I started thinking about it again. I felt there are still many ways to improve the game experience, despite all the many great games out there. I found Sacha, my co-founder as I was looking for someone who shared the same ideas. In the end we were also joined by Johan, our CTO, who was the same guy I wanted to start my video game company with now 17 years ago. Better late than never!” Better late than never indeed.


lightbulb crew


Built with Unity3D, using Coherent UI.

“We chose Unity for its support of multiple platforms, as well as the utilities in the app store. For example we wanted to be able to release simplified versions as mobile game clients for spectating. At the time it was really only Unity that could do this.  We had a very specific problem to solve in our UI: for one of our features we needed to be able to change textures in run-time, e.g. to update a flag or a screen with a team-logo etc. We came up with using web technology to do this, and started looking around. We tried out a few different solutions, and Coherent UI was by far the highest quality one. Once we succeeded with this limited feature, we realized we could use web to access all our menus outside of a match. This makes it easier for us to then be able to reuse these menus outside the game client.”


Coherent UI is an HTML5-based multi-platform user interface engine for games. Hundreds of projects and thousands of developers are using Coherent UI to create beautiful and interactive user interfaces for their games using familiar tools and process. Developers enjoy natural design-oriented workflow and fast iteration time with live editing, which helps them shorten time-to-market. With partnerships with companies like Unity and heavily investing in original R&D, Coherent Labs is in the best position to help developers building the next generation of awesome games like GoG.


Why MOBA, why Games of Glory?

When asked how did they come up with the Games of Glory idea, Anders explained: “We want to make games for the hard to mid-core gamers, that also brings in various social aspects into the core game play. Games of Glory is exactly like that: a game with core game play that emphasizes skill, but where the focus on clubs and a persistent universe gives lots of opportunity for meaningful social interactions that become key to the experience of the game. We were influenced by many different genres, MMOs, hack & slash, shooters, and also the large MOBAs. Our key challenge was to find the balance between all these genres. We decided to leave out some of the core aspects of traditional MOBA and focus on a faster and more faster action game play.”


The game play does seem amazing. A player will be able to impact the future of the Synarchy by choosing to support different Factions. A player with more fame will have more impact over the future of the Synarchy, but everyone will be able to influence its direction. Each conflict will take place over a certain time, and as the winning Faction is determined, the game world will change.


Also, players will be able to discover the stories of the Synarchy through various quests related to the different Factions and Clones. Some of the themes will be:

- Expansion of the Synarchy: Will the Synarchy invade new planets, or will they manage to remain independent?
- Personal vendettas: Who is the most glorious/evil/magnanimous of the luminaries in the Synarchy?
- Trade rights and monopolies: Who will gain access to the riches of scarce minerals and exotic aliens?

79364682b9fb32d05270cb4feed20a43_large

Combat Mechanics

Part of what sets GoG apart are its controls and the ability to change weapons within the match. The team has put a lot of thought into creating weapons with different types of game play, like shotguns that push back enemies, weapons that slow, do area of effect damage, etc. There are around 50 different weapons. Each Clone comes with a set of unique abilities that allows for many interesting combinations based on team members, enemies, and weapons selected.


Character Customization

Lightbulb Crew are truly focused on giving the community the chance to create their own content. The first step is to give the ability to personalize Clones with different skins. In addition to skins with different mix-and-match parts, they are also creating Club Skins, where players can create their own unique Club “clothes”. Here are just a couple of “teasers”.


 DEADBALL


GRENDEL


Let’s give them our support!

This is definitely one of the most intriguing ongoing projects I’ve seen and I can’t wait to see how will its development turn out and get my own hands on playing Games of Glory. Please support our friends in their Kickstarter campaign Here. They have plenty of surprises for all backers.

See you in the Arena!


Our Online shop is now open!

$
0
0

We are very happy to let you know that our online shop is now open! :) We are sorry for the delay and would like to thank you all for your patience and support.


You can subscribe for Coherent UI 2 only for $12.99 per month. Coherent UI 2 includes many new core features as well as performance improvements and fixes. Please check our product solution page for a detailed review of the new features and our changelog for the list of changes.


Get Coherent UI 2 for Unreal Engine 4 ->

Get Coherent UI 2 for Unity3D ->


Coherent UI will not be available on the Unity Asset Store from Aug 6

$
0
0

We, at Coherent Labs work hard to create the best game user interface solution. We need constant feedback to improve Coherent UI, so we need to have open communication channels with our customers. Unfortunately as a vendor on the Asset Store we receive only aggregate sales information and cannot proactively reach out and help our customers and provide them with relevant information.


In many cases our users don’t know how to reach our support when they encounter issues. We would like to connect better to our customers and give them the professional support we offer. Additionally we wanted to provide more flexible payment options as subscription, but the asset store terms are not customizable.


Coherent UI has been one of the best-rated and most valued Unity3D GUI assets in the Unity Asset Store for more than one year already. In order to improve our service we decided to remove Coherent UI from Unity Asset Store and continue to provide the product only through our website.


Our clients will continue to receive their updates with fixes and optimizations. The notifications of new releases will come from us, instead of the asset store. To sign up for these new releases, please send an e-mail to acho at coherent-labs.com with your relevant information (name, e-mail and invoice number).


Thank you very much for your support!


Coherent UI Menu Kit for Unity3D

$
0
0

Hello everybody,

I would like to present you our newest feature – the Coherent UI Menu Kit, which is available in Coherent UI 2.3.0.0 for Unity3D.

The Game Menu Kit idea was born in a brainstorm session where we wanted to ease the Unity3D UI Developers – what can save you time, has a visible effect on your game and let you do the fun, experimental and prototyping part. The Unity3D Game Menu Kit is designed to take away the hassle of creating a simple usable menu that works. In just a matter of minutes you can add any number of buttons and attach handlers to each of them, saving you precious prototyping time.
 

How it works?
1. Add the Coherent UI Menu script to an object that has a Coherent UI View component
2. In the Buttons -> Size property of the Coherent UI Menu script enter the desired number of buttons that you want to see in the menu and click enter
3. For each of the buttons enter its name and whether the button should look Disabled
4. To attach a handler to a button:

  • Attach the script that contains the button handler functions to the game object that has the Coherent UI Menu script
  • Go to the Menu script and expand the Click property of the button you want to attach a handler to
  • Enter a function name that you want to be attached as a handler
  • Click “Is Message” checkbox

This is our initial implementation of the Menu kit and and we plan to further improve and build on it. In the next iteration we would like to include more customization options – Integrated color picker to adjust menu colors and more positioning and styling options.


Get started with Coherent Ui for Unity3D today!

New feature and video tutorial: UE4 Game Menu Kit

$
0
0

Hey guys,
 
How often do you think of the time and efforts you spend to create the basics of your own UE4 HUD and UE4 Game Menu?
 
I would like to present you of the newest Coherent UI features, available in our 2.3.0.0 release – the Coherent UI Menu Kit for Unreal Engine 4.
 
The UE4 Game Menu Kit is designed to take away the hassle of creating a simple usable menu that works using only Blueprints. No C++ code at all. In just a matter of minutes you can add any number of buttons and attach handlers to each of them, saving you precious prototyping time.
 
Here’s what has to be done – 3 simple steps:
1. The HTML Menu page that comes with the Kit has everything setup, so you just have to load it using the Setup UI View box.
2. Use the Setup UI Menu box. It takes two parameters – a view component that will be used to display the menu (this should be one that has already loaded the Menu HTML page) and Menu Info – a struct that holds the menu button names and some additional visibility and positioning options. The box returns a menu object that will be used to handle click events.
3. Attach handler for the OnMenuButtonClicked event dispatcher of the menu object. The dispatcher fires an event for every button clicked and has the name of the button clicked as a parameter.
 
In the video below, one of our developers – Stan is doing a thorough guide of how to setup your own UE4 Game Menu, using Coherent UI. Enjoy!


Get started with Coherent Ui for Unreal Engine 4 today!
Viewing all 172 articles
Browse latest View live